In this article
Many people buy a unit, use it a few times and give up because their gums hurt, water sprays everywhere, or they notice no difference. In most cases the cause is technique, not the device. This guide on how to use a water flosser covers the benefits, the first session, and cleaning and care, so you or your customers get it right from day one.
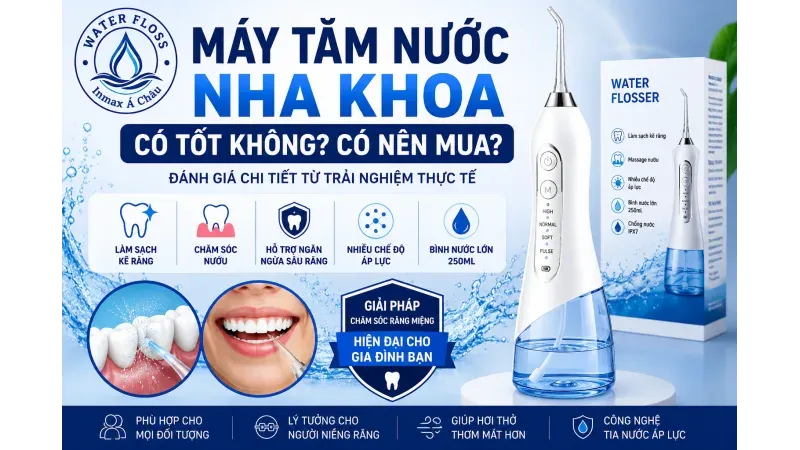
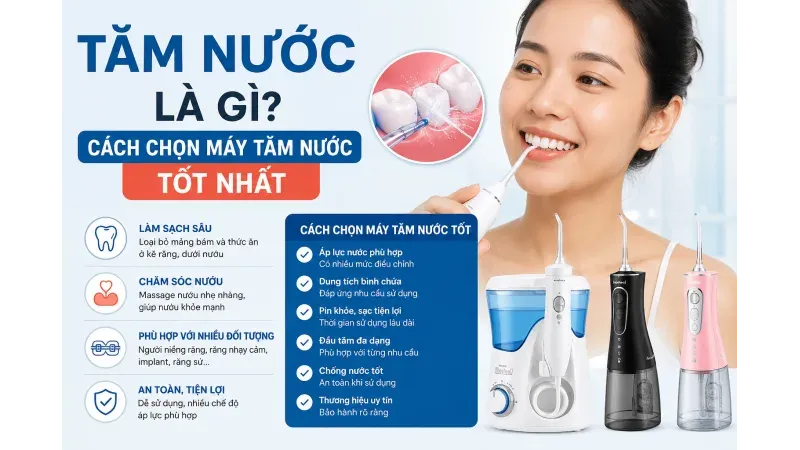
First of all, a water flosser does not replace your toothbrush. It does the job that brush and string floss do poorly: flushing soft plaque and food debris from between teeth, from gum pockets and from around orthodontic appliances with a pulsing jet.
Benefits of water flossing
- Cleans between teeth and two to three millimetres into gum pockets, where bristles cannot reach.
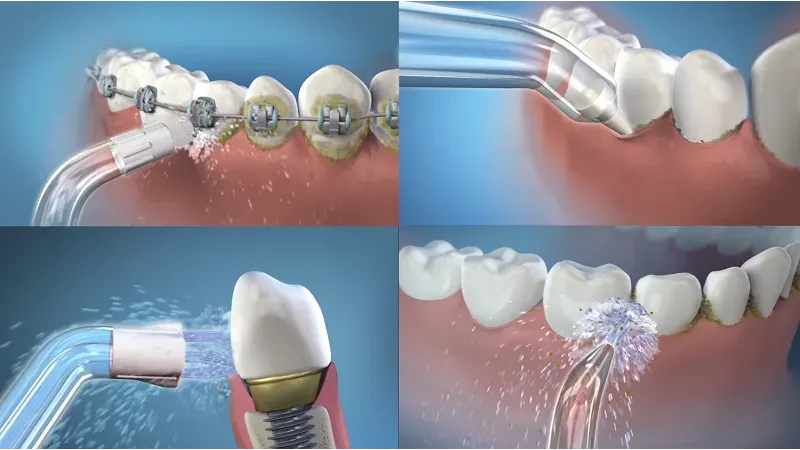
- Cleans around brackets, archwires, bridges and implants without causing damage.
- Massages the gums and reduces bleeding after a few weeks of regular use.
- Reduces bad breath caused by trapped food and bacteria on the tongue and in gum pockets.
- Supports cleaning after scaling or periodontal treatment, as directed by your dentist.

How to use a water flosser step by step
Step 1. Prepare the unit and the water
Fill the reservoir with warm water; never hot, as it damages the pump. Warm water also eases sensitivity for people with tender teeth. Fit the right tip: standard for most people, orthodontic for braces, periodontal for gum disease.
Step 2. Choose the pressure
Always use the lowest setting in the first week. Once your gums are used to it, move up gradually to medium. High is only for braces wearers or long-time users, and only on the back teeth. Never start on high.
Step 3. Position and technique
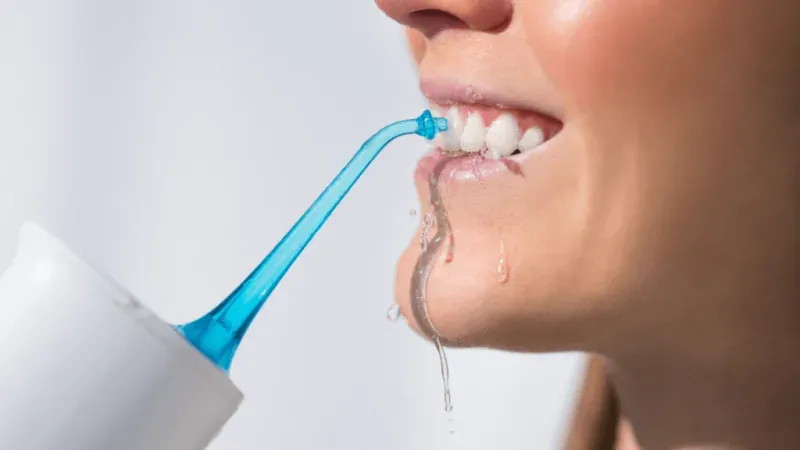
Lean over the sink, place the tip in your mouth before switching on so water does not spray out. Keep your lips loosely closed so water drains into the sink. Hold the tip at a right angle to the gumline, move slowly along the gums, pausing one to two seconds at each gap. Do the outside then the inside, upper jaw then lower. The whole pass takes one to two minutes.
Step 4. Finish
Switch off before removing the tip from your mouth. Empty the leftover water, run the unit a few seconds to clear the tube, and wipe the body dry. Rinse your mouth with clean water.
Common mistakes
Using high pressure on day one, getting bleeding gums and then giving up. Aiming the jet straight at the gums instead of tracing the gumline. Leaving water in the reservoir for days, causing odour and deposits. Sharing one tip between several people. Each is easy to avoid if you remember: gentle first, stronger later; slow and steady; clean the unit after every use.
Cleaning and care
Once a week, soak the tips in diluted vinegar or mouthwash for 10 minutes and rinse. Once a month, fill the reservoir with diluted vinegar, run half of it, let it sit 15 minutes, run the rest and flush with clean water to clear deposits from the pump. Replace tips every three to six months. Charge when the unit warns of low battery; do not leave it on the charger for days.
Inmax units are IPX7 rated and carry a 24-month warranty. If a unit develops a fault, see the process on the warranty page or call our hotline. See more models on the product page.
Many people buy a unit, use it a few times and give up because their gums hurt, water sprays everywhere, or they notice no difference. In most cases the cause is technique, not the device. This guide on how to use a water flosser covers the benefits, the first session, and cleaning and care, so you or your customers get it right from day one.
First of all, a water flosser does not replace your toothbrush. It does the job that brush and string floss do poorly: flushing soft plaque and food debris from between teeth, from gum pockets and from around orthodontic appliances with a pulsing jet.
Benefits of water flossing
- Cleans between teeth and two to three millimetres into gum pockets, where bristles cannot reach.
- Cleans around brackets, archwires, bridges and implants without causing damage.
- Massages the gums and reduces bleeding after a few weeks of regular use.
- Reduces bad breath caused by trapped food and bacteria on the tongue and in gum pockets.
- Supports cleaning after scaling or periodontal treatment, as directed by your dentist.
How to use a water flosser step by step
Step 1. Prepare the unit and the water
Fill the reservoir with warm water; never hot, as it damages the pump. Warm water also eases sensitivity for people with tender teeth. Fit the right tip: standard for most people, orthodontic for braces, periodontal for gum disease.
Step 2. Choose the pressure
Always use the lowest setting in the first week. Once your gums are used to it, move up gradually to medium. High is only for braces wearers or long-time users, and only on the back teeth. Never start on high.
Step 3. Position and technique
Lean over the sink, place the tip in your mouth before switching on so water does not spray out. Keep your lips loosely closed so water drains into the sink. Hold the tip at a right angle to the gumline, move slowly along the gums, pausing one to two seconds at each gap. Do the outside then the inside, upper jaw then lower. The whole pass takes one to two minutes.
Step 4. Finish
Switch off before removing the tip from your mouth. Empty the leftover water, run the unit a few seconds to clear the tube, and wipe the body dry. Rinse your mouth with clean water.
Common mistakes
Using high pressure on day one, getting bleeding gums and then giving up. Aiming the jet straight at the gums instead of tracing the gumline. Leaving water in the reservoir for days, causing odour and deposits. Sharing one tip between several people. Each is easy to avoid if you remember: gentle first, stronger later; slow and steady; clean the unit after every use.
Cleaning and care
Once a week, soak the tips in diluted vinegar or mouthwash for 10 minutes and rinse. Once a month, fill the reservoir with diluted vinegar, run half of it, let it sit 15 minutes, run the rest and flush with clean water to clear deposits from the pump. Replace tips every three to six months. Charge when the unit warns of low battery; do not leave it on the charger for days.
Inmax units are IPX7 rated and carry a 24-month warranty. If a unit develops a fault, see the process on the warranty page or call our hotline. See more models on the product page.
很多人买了机器用几次就放弃,因为牙龈疼、水溅得到处都是,或者感觉没有区别。原因大多出在用法上而不是机器本身。下面这份冲牙器使用指南从作用、第一次使用讲到清洗和保养,让您或您的客户从第一天就用对。
首先,冲牙器不能代替牙刷。它做的是牙刷和牙线做不好的事:用脉冲水流冲走牙缝、牙龈袋和正畸装置周围的软性牙菌斑和食物残渣。
冲牙器的作用
- 清洁牙缝和深达两到三毫米的牙龈袋,牙刷刷毛碰不到的地方。
- 清洁托槽、弓丝、牙桥、种植牙周围而不造成损伤。
- 按摩牙龈,规律使用几周后减少牙龈出血。
- 减少因食物滞留以及舌苔和牙龈袋细菌引起的口臭。
- 按牙医指导,辅助洗牙或牙周治疗后的清洁。
冲牙器使用指南分步讲解
第 1 步:准备机器和水
往水箱加温水,不要用热水,会损坏水泵。温水还能减轻牙齿敏感者的酸痛。装上合适的喷嘴:普通人用标准喷嘴,正畸人群用正畸喷嘴,牙周炎患者用牙周袋喷嘴。
第 2 步:选择压力档位
第一周始终使用最低档。牙龈适应后逐步调到中档。高档只适合正畸人群或已经长期使用的人,而且只用于后牙区域。永远不要从高档开始。
第 3 步:姿势和操作
俯身在洗手池上方,先把喷嘴放进嘴里再开机,以免水溅出来。嘴唇虚掩,让水流入洗手池。喷嘴与牙龈边缘垂直,沿牙龈缓慢移动,在每个牙缝停留一到两秒。先外侧后内侧,先上牙弓后下牙弓。全程约一到两分钟。
第 4 步:结束
先关机再把喷嘴从嘴里拿出来。倒掉剩余的水,开机几秒排空管内的水,擦干机身。用清水漱口。
常见错误
第一天就用高档,导致牙龈出血后不敢再用。把水流直对牙龈而不是沿牙龈边缘移动。水在水箱里放好几天产生异味和水垢。多人共用一个喷嘴。只要记住原则,这些错误都很容易避免:先轻后强;缓慢均匀;每次用完清洁机器。
机器的清洗和保养
每周一次,将喷嘴浸泡在稀释的醋或漱口水中 10 分钟后冲洗干净。每月一次,往水箱倒入稀释的醋,开机运行一半,静置 15 分钟后运行完,再用清水冲洗以清除水泵中的水垢。喷嘴每三到六个月更换。机器提示电量低时再充电,不要连续充电多天。
Inmax 的机器达到 IPX7 防水等级,保修 24 个月。如果机器在使用过程中出现故障,请查看 保修页面 的流程或联系热线。在 产品页 查看更多在售型号。
많은 분이 기기를 사서 몇 번 쓰고는 잇몸이 아프거나 물이 사방으로 튀거나 차이를 못 느껴 포기합니다. 원인은 대부분 기기가 아니라 사용법에 있습니다. 아래 구강세정기 사용 안내는 효능, 첫 사용법, 세척과 보관까지 다루어 본인이나 고객이 첫날부터 제대로 쓰도록 돕습니다.
먼저, 구강세정기는 칫솔을 대신하지 않습니다. 칫솔과 치실이 잘 못하는 일, 즉 펄스 물줄기로 치아 사이, 잇몸 주머니, 교정 장치 주변의 연한 플라그와 음식물 찌꺼기를 씻어내는 일을 합니다.
구강세정기의 효능
- 칫솔모가 닿지 않는 치아 사이와 2~3mm 깊이의 잇몸 주머니를 닦습니다.
- 브라켓, 와이어, 브릿지, 임플란트 주변을 손상 없이 닦습니다.
- 잇몸을 마사지해 몇 주 꾸준히 쓰면 잇몸 출혈이 줄어듭니다.
- 혀와 잇몸 주머니에 남은 음식물과 세균으로 인한 입냄새를 줄입니다.
- 치과의사의 지시에 따라 스케일링이나 치주 치료 후 세정을 돕습니다.
단계별 구강세정기 사용 안내
1단계. 기기와 물 준비
탱크에 미지근한 물을 채우세요. 뜨거운 물은 펌프를 망가뜨립니다. 미지근한 물은 치아가 예민한 분의 시림도 덜어 줍니다. 맞는 팁을 끼우세요. 일반인은 표준 팁, 교정 중이면 교정용 팁, 치주염이면 잇몸 주머니용 팁입니다.
2단계. 압력 선택
첫 주에는 항상 가장 낮은 단계를 쓰세요. 잇몸이 적응하면 중간 단계로 서서히 올립니다. 높은 단계는 교정 환자나 오래 쓴 분에게만, 그것도 어금니 부위에만 씁니다. 절대 높은 단계로 시작하지 마세요.
3단계. 자세와 동작
세면대 위로 몸을 숙이고, 물이 튀지 않도록 팁을 입에 넣은 뒤 전원을 켜세요. 입술을 살짝 벌려 물이 세면대로 흐르게 합니다. 팁을 잇몸선에 직각으로 대고 잇몸을 따라 천천히 움직이며 치아 사이마다 1~2초 멈춥니다. 바깥쪽 다음 안쪽, 위턱 다음 아래턱 순서로 하며 전체 1~2분이면 됩니다.
4단계. 마무리
팁을 입에서 빼기 전에 전원을 끄세요. 남은 물을 버리고 몇 초 작동시켜 관 안의 물을 빼낸 뒤 본체를 닦습니다. 깨끗한 물로 입을 헹굽니다.
흔한 실수
첫날부터 높은 단계를 써서 잇몸에 피가 난 뒤 겁이 나 쓰지 않는 것. 잇몸선을 따라가지 않고 물줄기를 잇몸에 똑바로 겨누는 것. 탱크에 물을 며칠씩 두어 냄새와 물때가 생기는 것. 여러 사람이 팁 하나를 함께 쓰는 것. 원칙만 기억하면 모두 쉽게 피할 수 있습니다. 약하게 먼저, 세게는 나중에. 천천히 고르게. 쓸 때마다 기기를 깨끗이.
기기 세척과 보관
주 1회 팁을 희석한 식초나 구강청결제에 10분 담갔다가 깨끗이 헹굽니다. 월 1회 희석한 식초를 탱크에 넣고 절반을 작동시킨 뒤 15분 두었다가 나머지를 작동시키고 깨끗한 물로 헹궈 펌프의 물때를 제거합니다. 팁은 3~6개월마다 교체합니다. 배터리 부족 표시가 뜰 때 충전하고 며칠씩 충전기에 꽂아 두지 마세요.
Inmax 기기는 IPX7 방수 등급이며 24개월 보증됩니다. 사용 중 문제가 생기면 보증 페이지의 절차를 확인하거나 핫라인으로 연락하세요. 유통 중인 다른 모델은 제품 페이지에서 보실 수 있습니다.